Venue Window
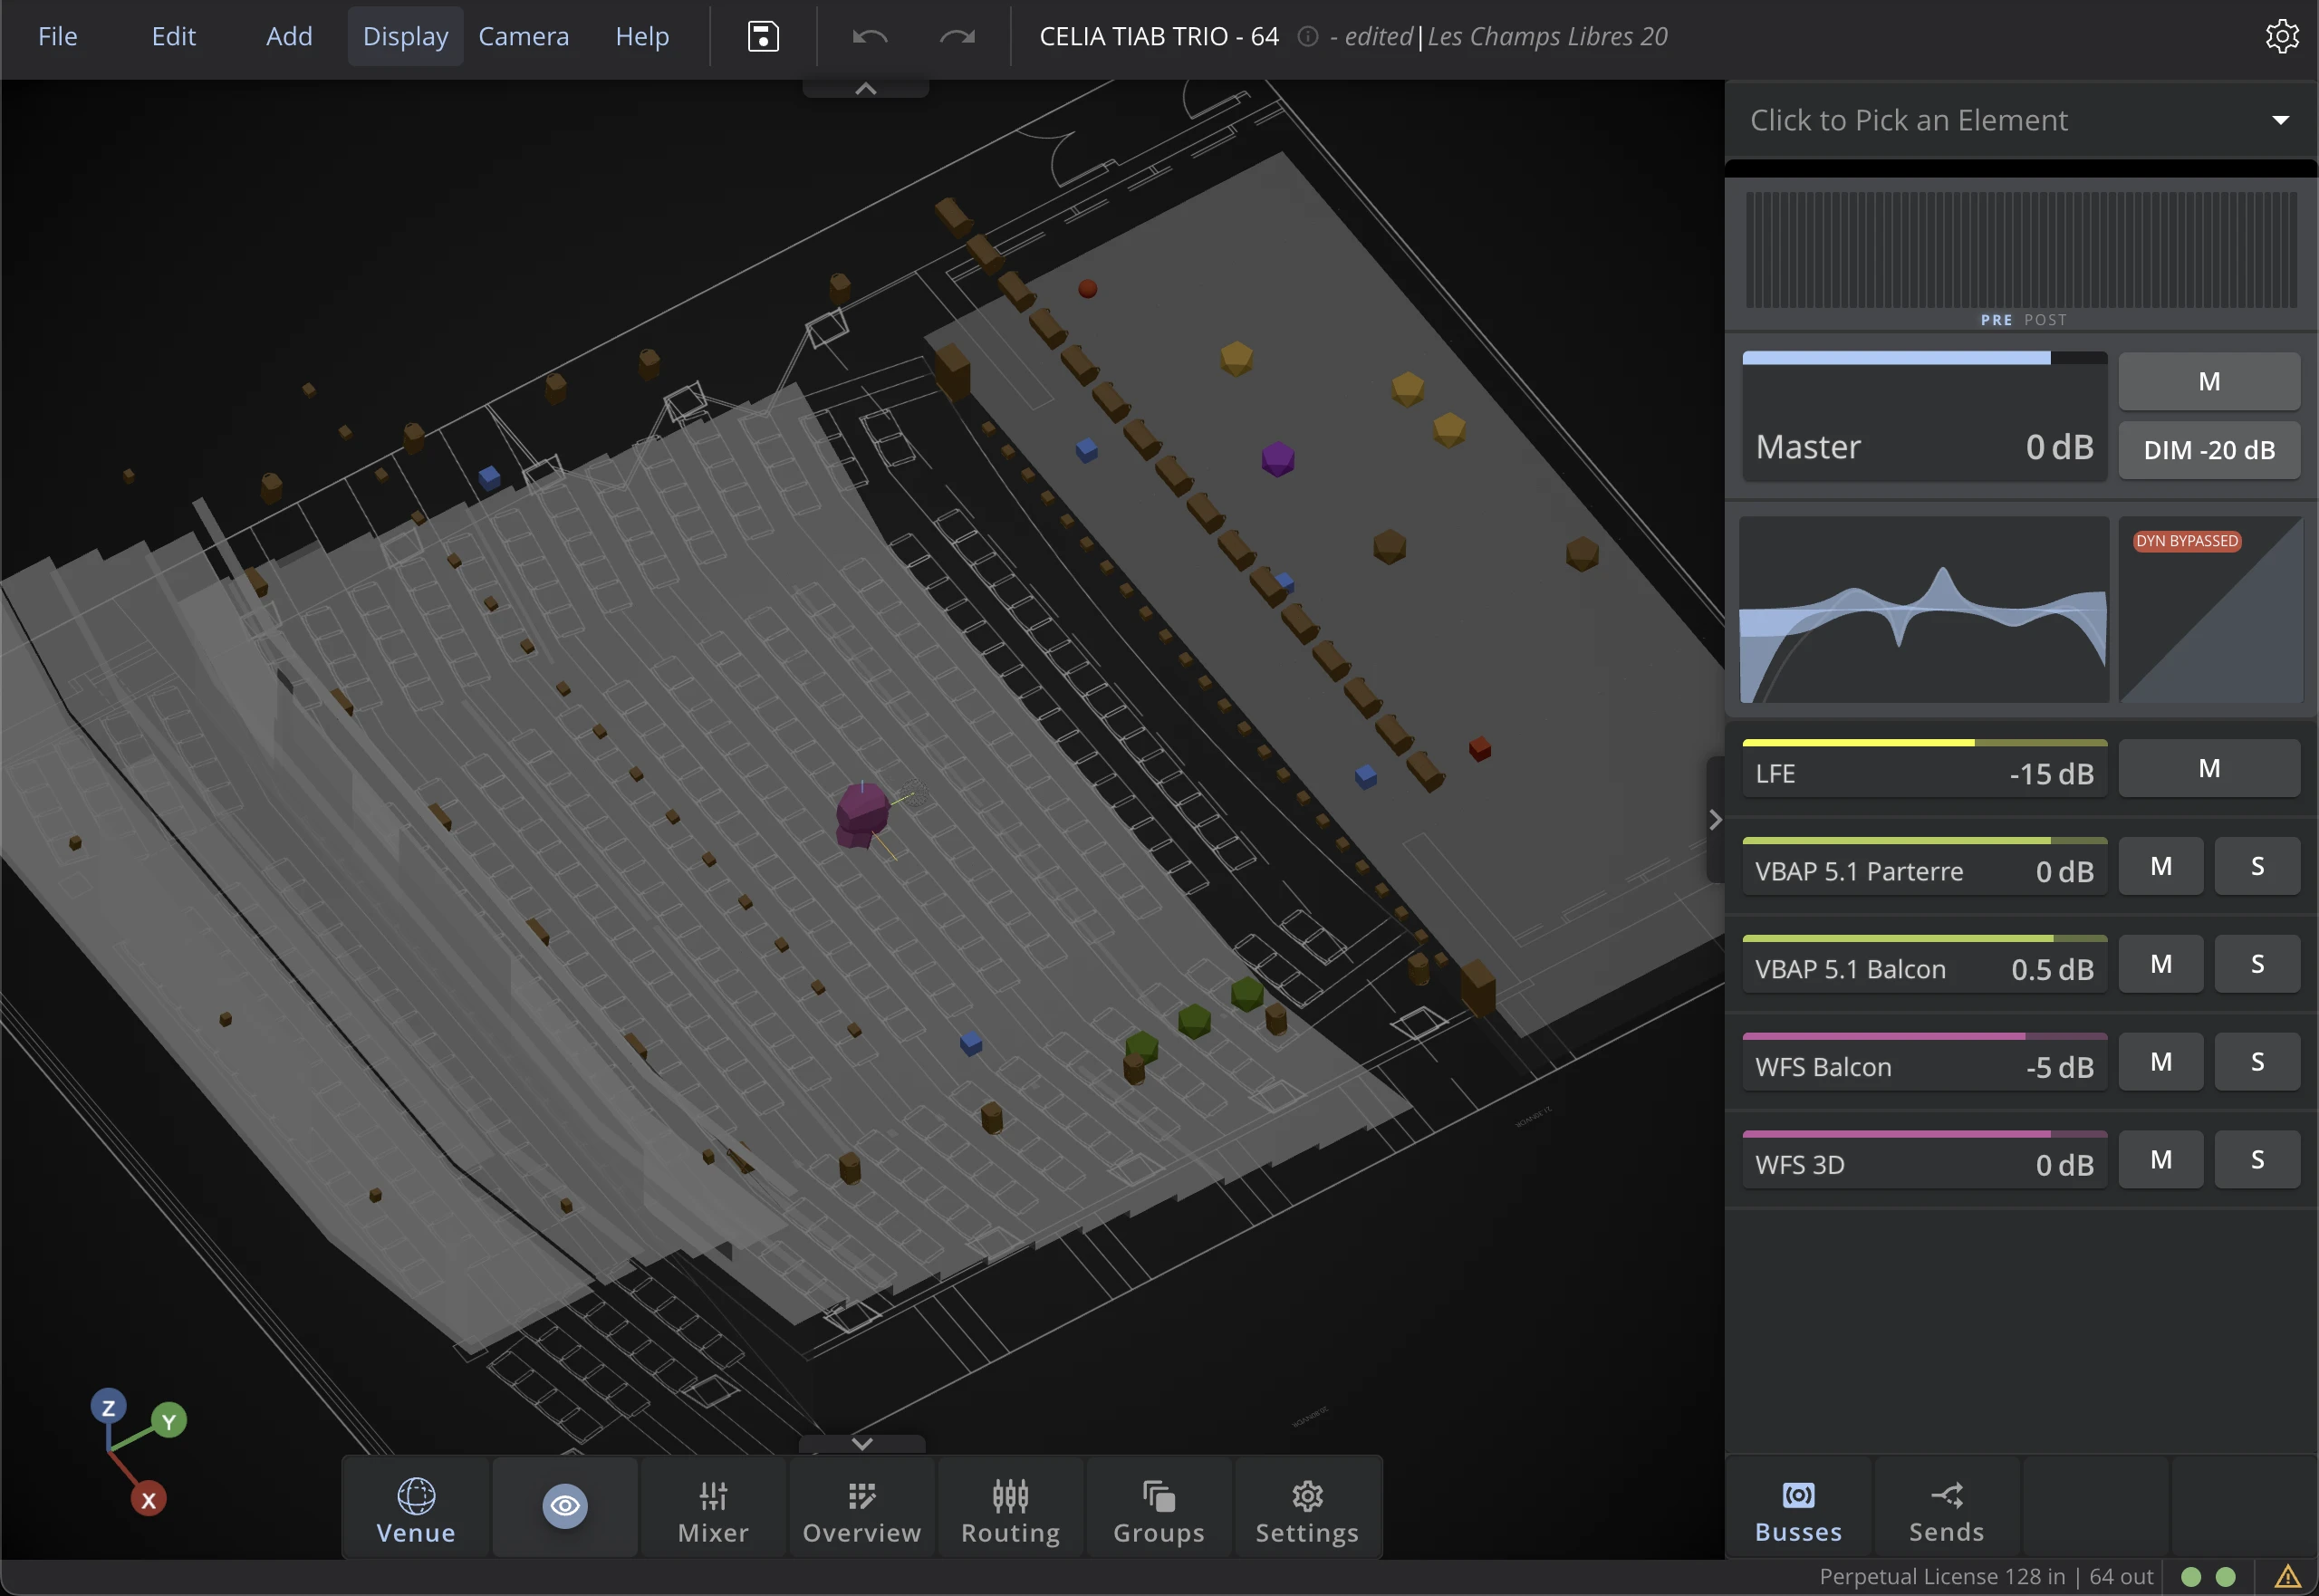
The Venue is a 3D interface for visualizing and editing Sources and Speakers positions. The spatialization algorithms rely on the position of the sources and the speakers to perform the automatic audio rendering.
Venue visualization
To help you position Sources and Speakers correctly, you can import the 2D Drawings or 3D Model to the Venue. Check this section to learn how to import them.
Use the Visibility Menu if you want to single out groups of virtual sources to display.
Right-Click Contextual Menu
From a right-click in the Venue, you can perform multiple tasks, depending on the context:
- Add or delete Sources, Bus and Speakers,
- Change the Grid display options
- Create a group from selection
- Select a transformation mode (see Objects Manipulation)
- Open the Transformer Arranger (see Objects Manipulation)
- Open the Venue Parameters (see Venue Parameters)
- etc.
Moving Objects
HOLOPHONIX offers an advanced positioning tool, for precise control of the objects in 3D. When you click on the objects, the positioning tool that appears allows for the following handling:
- use the arrows to move the source on a specific axis,
- use the square in between axis to move the source in a specific plan.
For example, if you place your cursor on the square corresponding to the horizontal plane, when you move the source, only its X and Y (or Azimuth and Distance) coordinates will change. No elevation will be applied to the source.
Multiple Selection
To select multiple objects in the Venue, click and drag a selection box around the area containing the objects to select, or hold down the Shift key and click on the objects you want to select.
With the Transform and Arrange tools, you can manipulate your selection of Sources and/or Speakers in many ways.
Transform
Three transform modes are available when a multiple selection is performed. To switch between modes, you can use the right-click contextual menu, or the Display menu.
Mode
Direct GrabThis mode allows to directly move objects in the scene without having to select them first. When you click on an object, it will be selected and the transformation will be applied directly. This mode is especially useful to quickly move sources or speakers in the scene without having to select them first.
MoveThis is the default transformation mode, described in this section.
RotateThe rotation mode allows applying 3D rotations to a source (when the transformation reference is set to the center), or to a group of objects. Use red, green and blue circles to move the sources or speakers along a specific rotation axis.
The external yellow circle applies a rotation over the display plane (controlled by the Venue Orientation). For example, if you are set to the Top View, then the rotation will occur in the (x,y) plane. However, if you are set to the perspective view or to any 3D-viewing angle, the yellow external circle will apply a diagonal, oblique rotation.
Scale This transformation mode is only useful when multiple sources or speakers are selected. It allows changing the scaling of the selection. Use the different axis to scale the multiple selection, or use the plane scaling by clicking on the square in between two axes.
Reference
LocalThe center of the transformation will be the barycenter of the multiple selection.
Center The center of the transformation will be the center of the Venue.
For example:
- To apply a scaling to a multiple selection of sources, use the scaling mode with reference set to 'Local',
- To apply a rotation around the venue to a source or a multiple selection of sources, use the rotation mode with the reference set to 'Center'.
Arrangement
When multiple Sources or Speakers are selected, you can use the Arrangement menu from the right click menu to quickly arrange the objects in a line, a circle or a sphere.
For more advanced modes, you can use the Arrange Selection section of the Inspector to position the objects in a line, an arc or a sphere.
Venue Parameters
The venue parameters allows you to set advanced options for the Venue window, such as the grid display, the drawing options, the imported 3D model display, etc.
This menu enables advanced options for the grid, 2D, and 3D display of drawings and models in the venue window. If you need to only show basic drawing or grid and do not need multiple layers of drawings, you can simply set the basic venue display settings from the settings page. (See this section for more details on how to import 2D drawings, 3D models and manage their display).
Grid Display

Show Grid
Toggle to show or hide the grid in the Venue window.
Venue Size
Set the size of the grid in the Venue. This will not affect the actual size of the Venue, but only the display of the grid.
Grid Position
Set the position of the grid in the Venue. This will not affect the display of the grid.
Grid Opacity
Sets the opacity of the grid lines in the venue window. This can be useful to reduce the visual clutter of the grid when it is not needed for precise positioning.
Mesh Opacity
Sets the opacity of the point mesh that delimits the limits of the grid. This can be useful to reduce the visual clutter of the grid when it is not needed for precise positioning.
Floor Opacity
Sets the opacity of the floor in the venue window. This can be useful to have a visual reference of the ground level in the venue, especially when working with elevation.
2D Display
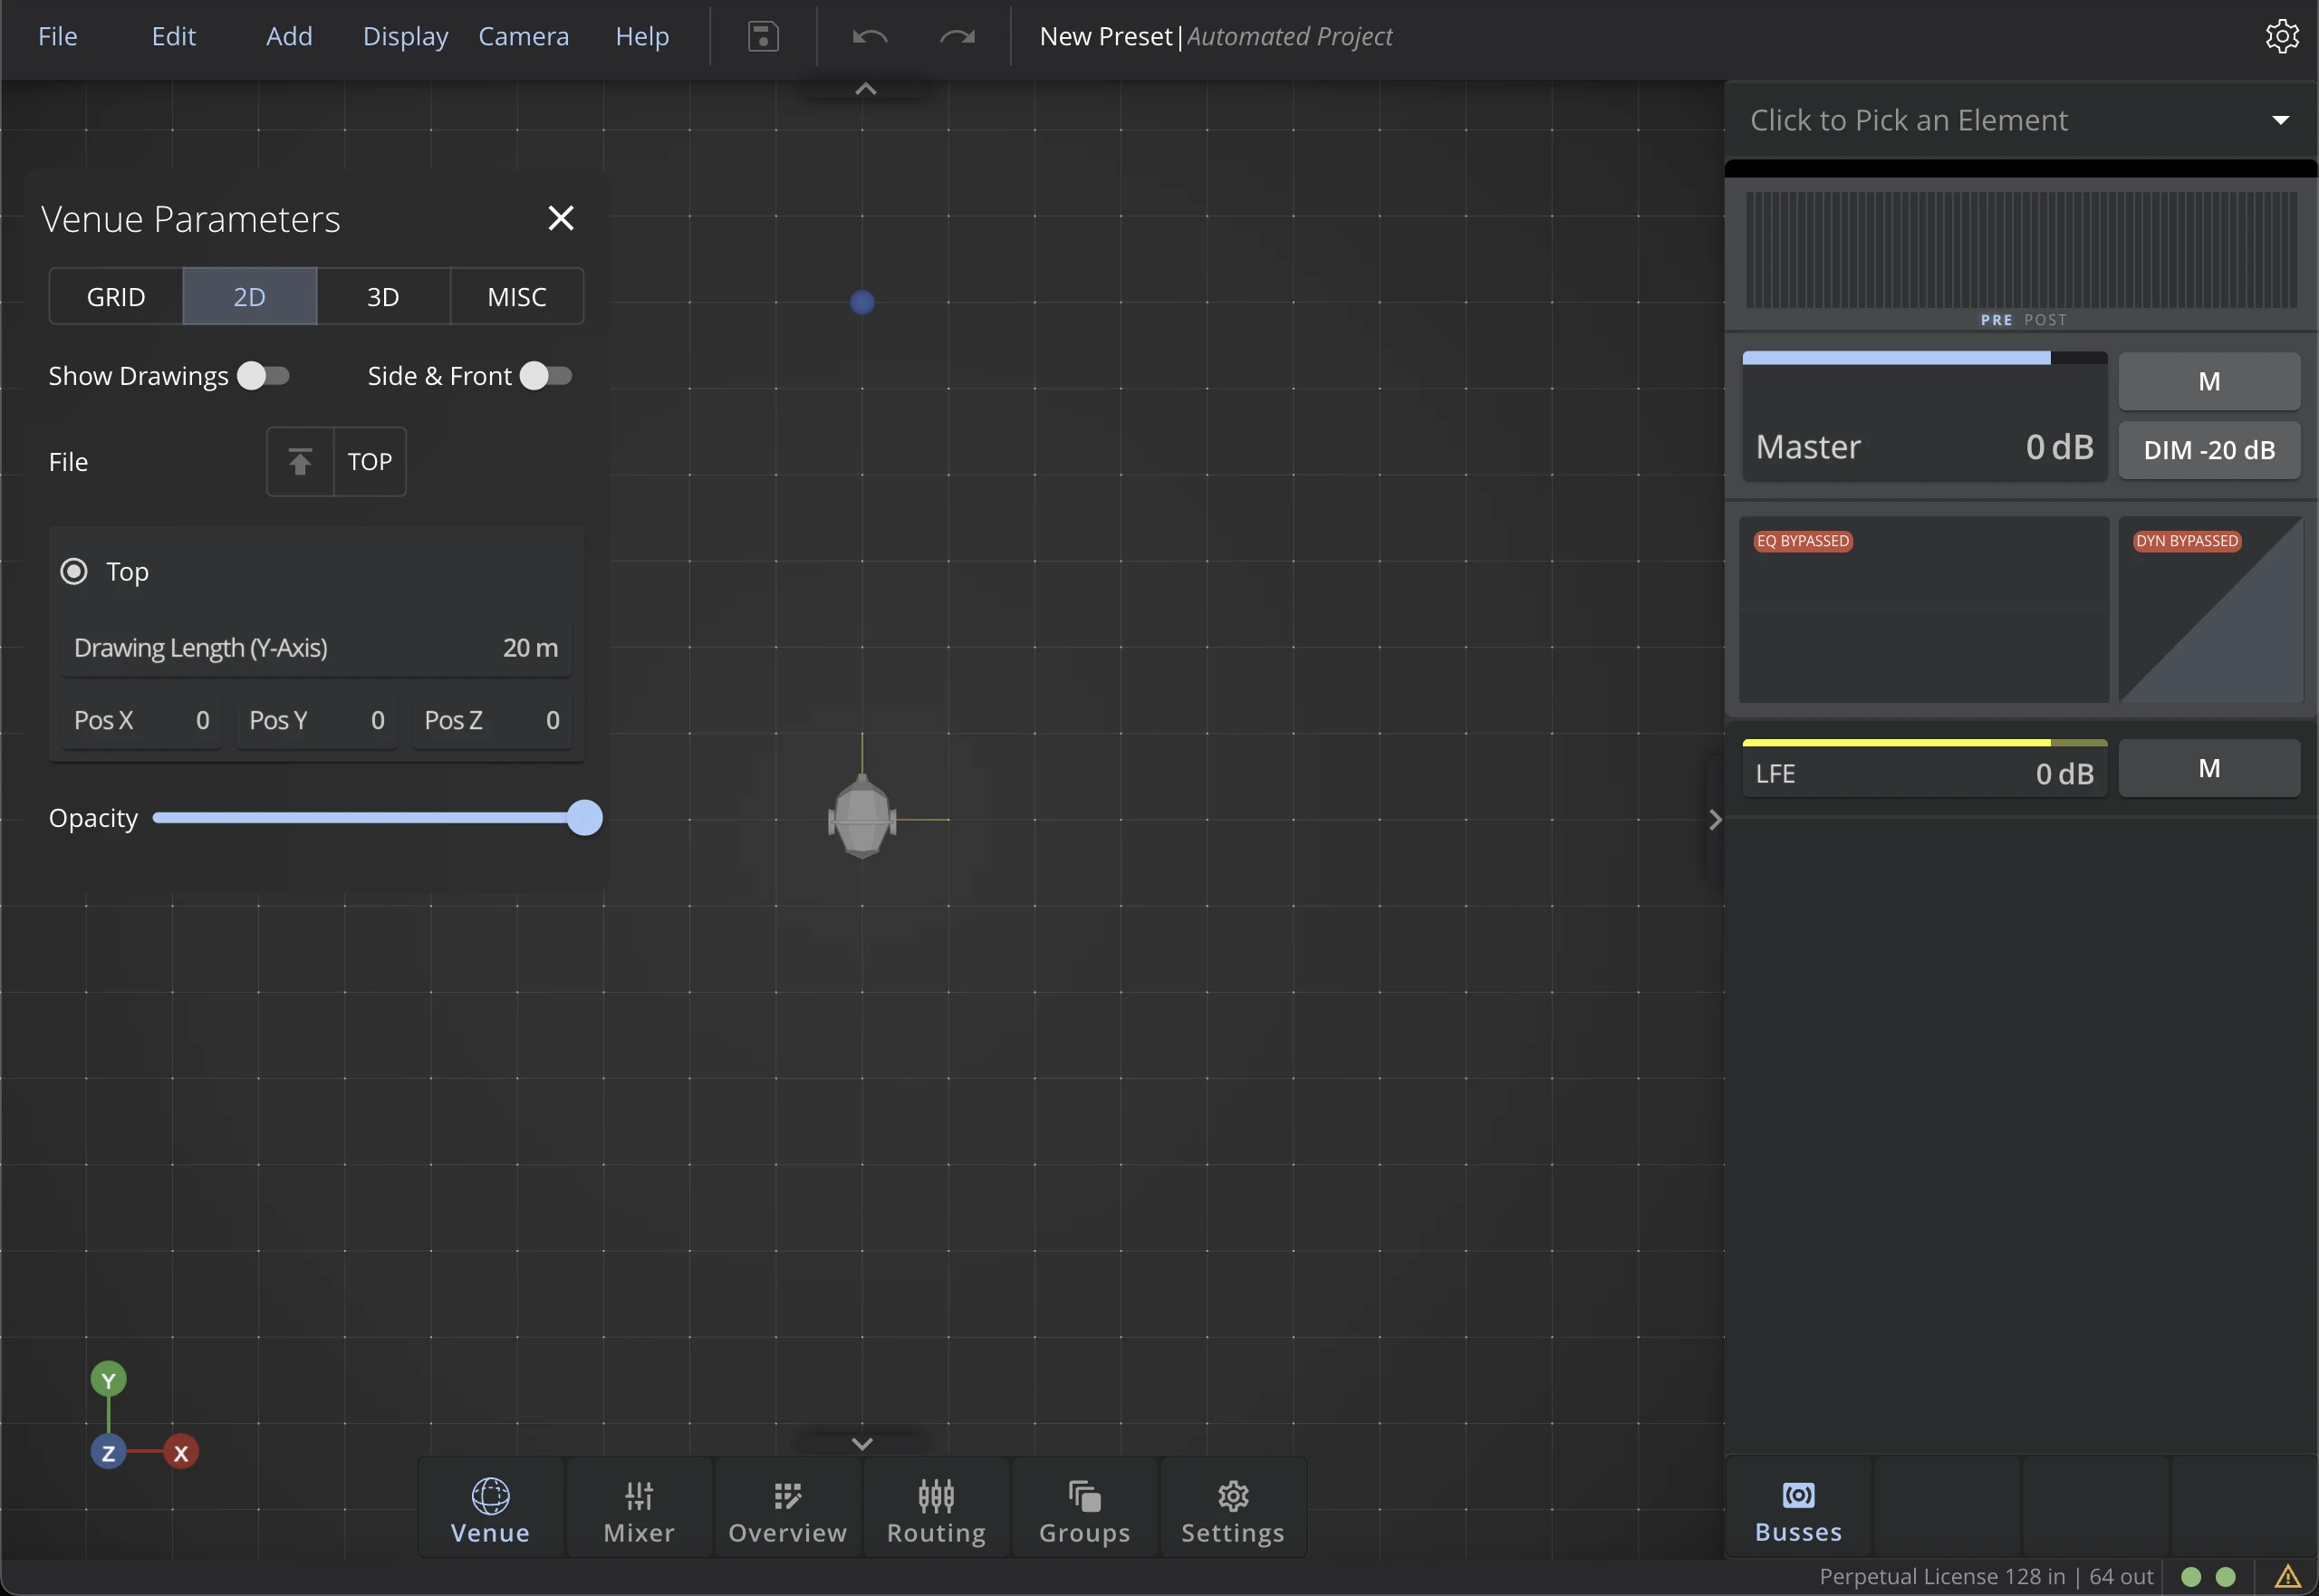
Show Drawings
Toggle to show or hide the 2D drawings in the Venue window.
Side & Front
Toggle to allows showing both the side and front views of the drawings in the Venue window.
Drawing Length
Set the length of the drawings in the Venue window. This is used to adjust the scale of the drawings to the actual size of the venue.
Drawing Position
Set the position of the drawings in the Venue window. This is used to adjust the position of the drawings to the actual position of the venue.
Opacity
Set the opacity of the 2D drawings in the Venue window. This can be useful to reduce visual clutter especially when working with both the 3D and 3D drawings at the same time.
3D Display
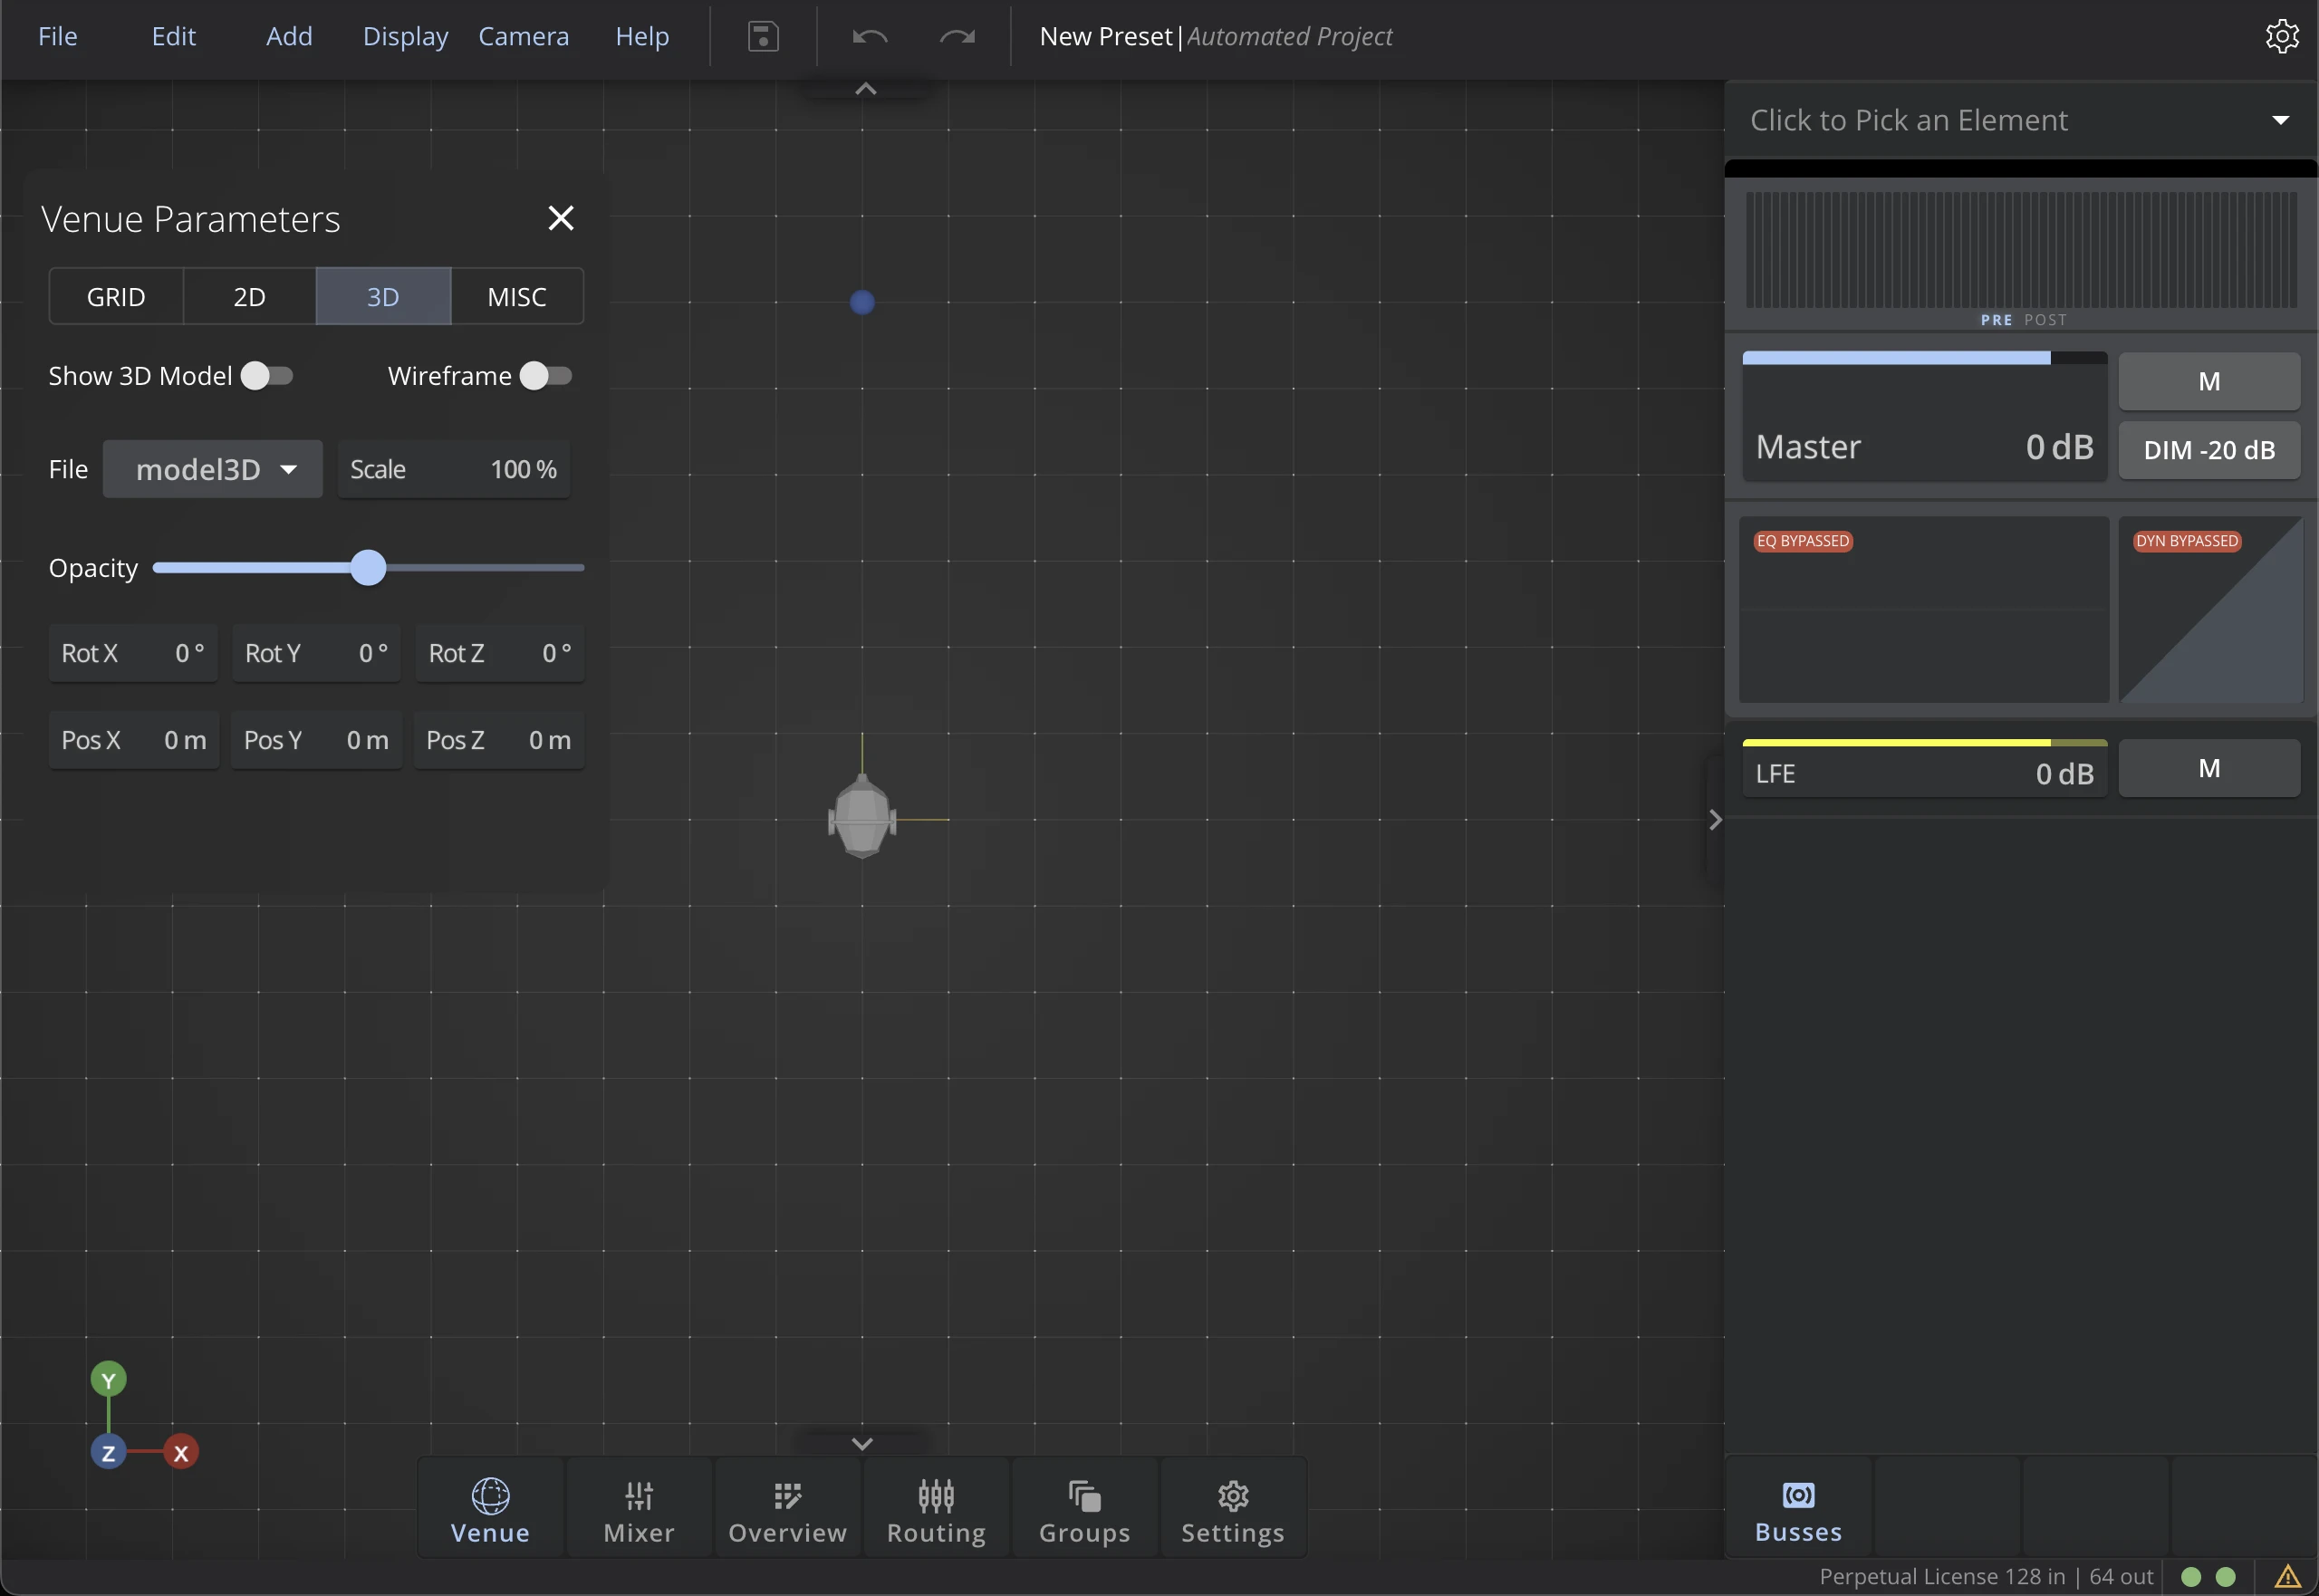
Show 3D Model
Toggle to show or hide the 3D model in the Venue window.
Wireframe
Toggle to show the 3D model in wireframe mode in the Venue window.
Model File
Select the 3D model file to import in the Venue window. Learn more about the supported 3D model formats and the import process in the Settings section of the documentation.
Model Opacity
Set the opacity of the 3D model in the Venue window. This can be useful to reduce visual clutter especially when working with both the 2D and 3D drawings at the same time.
Model Position & Rotation
Set the position and rotation of the 3D model in the Venue window. This is used to adjust the position and rotation of the 3D model to the actual position and rotation of the venue.
Miscellaneous Options
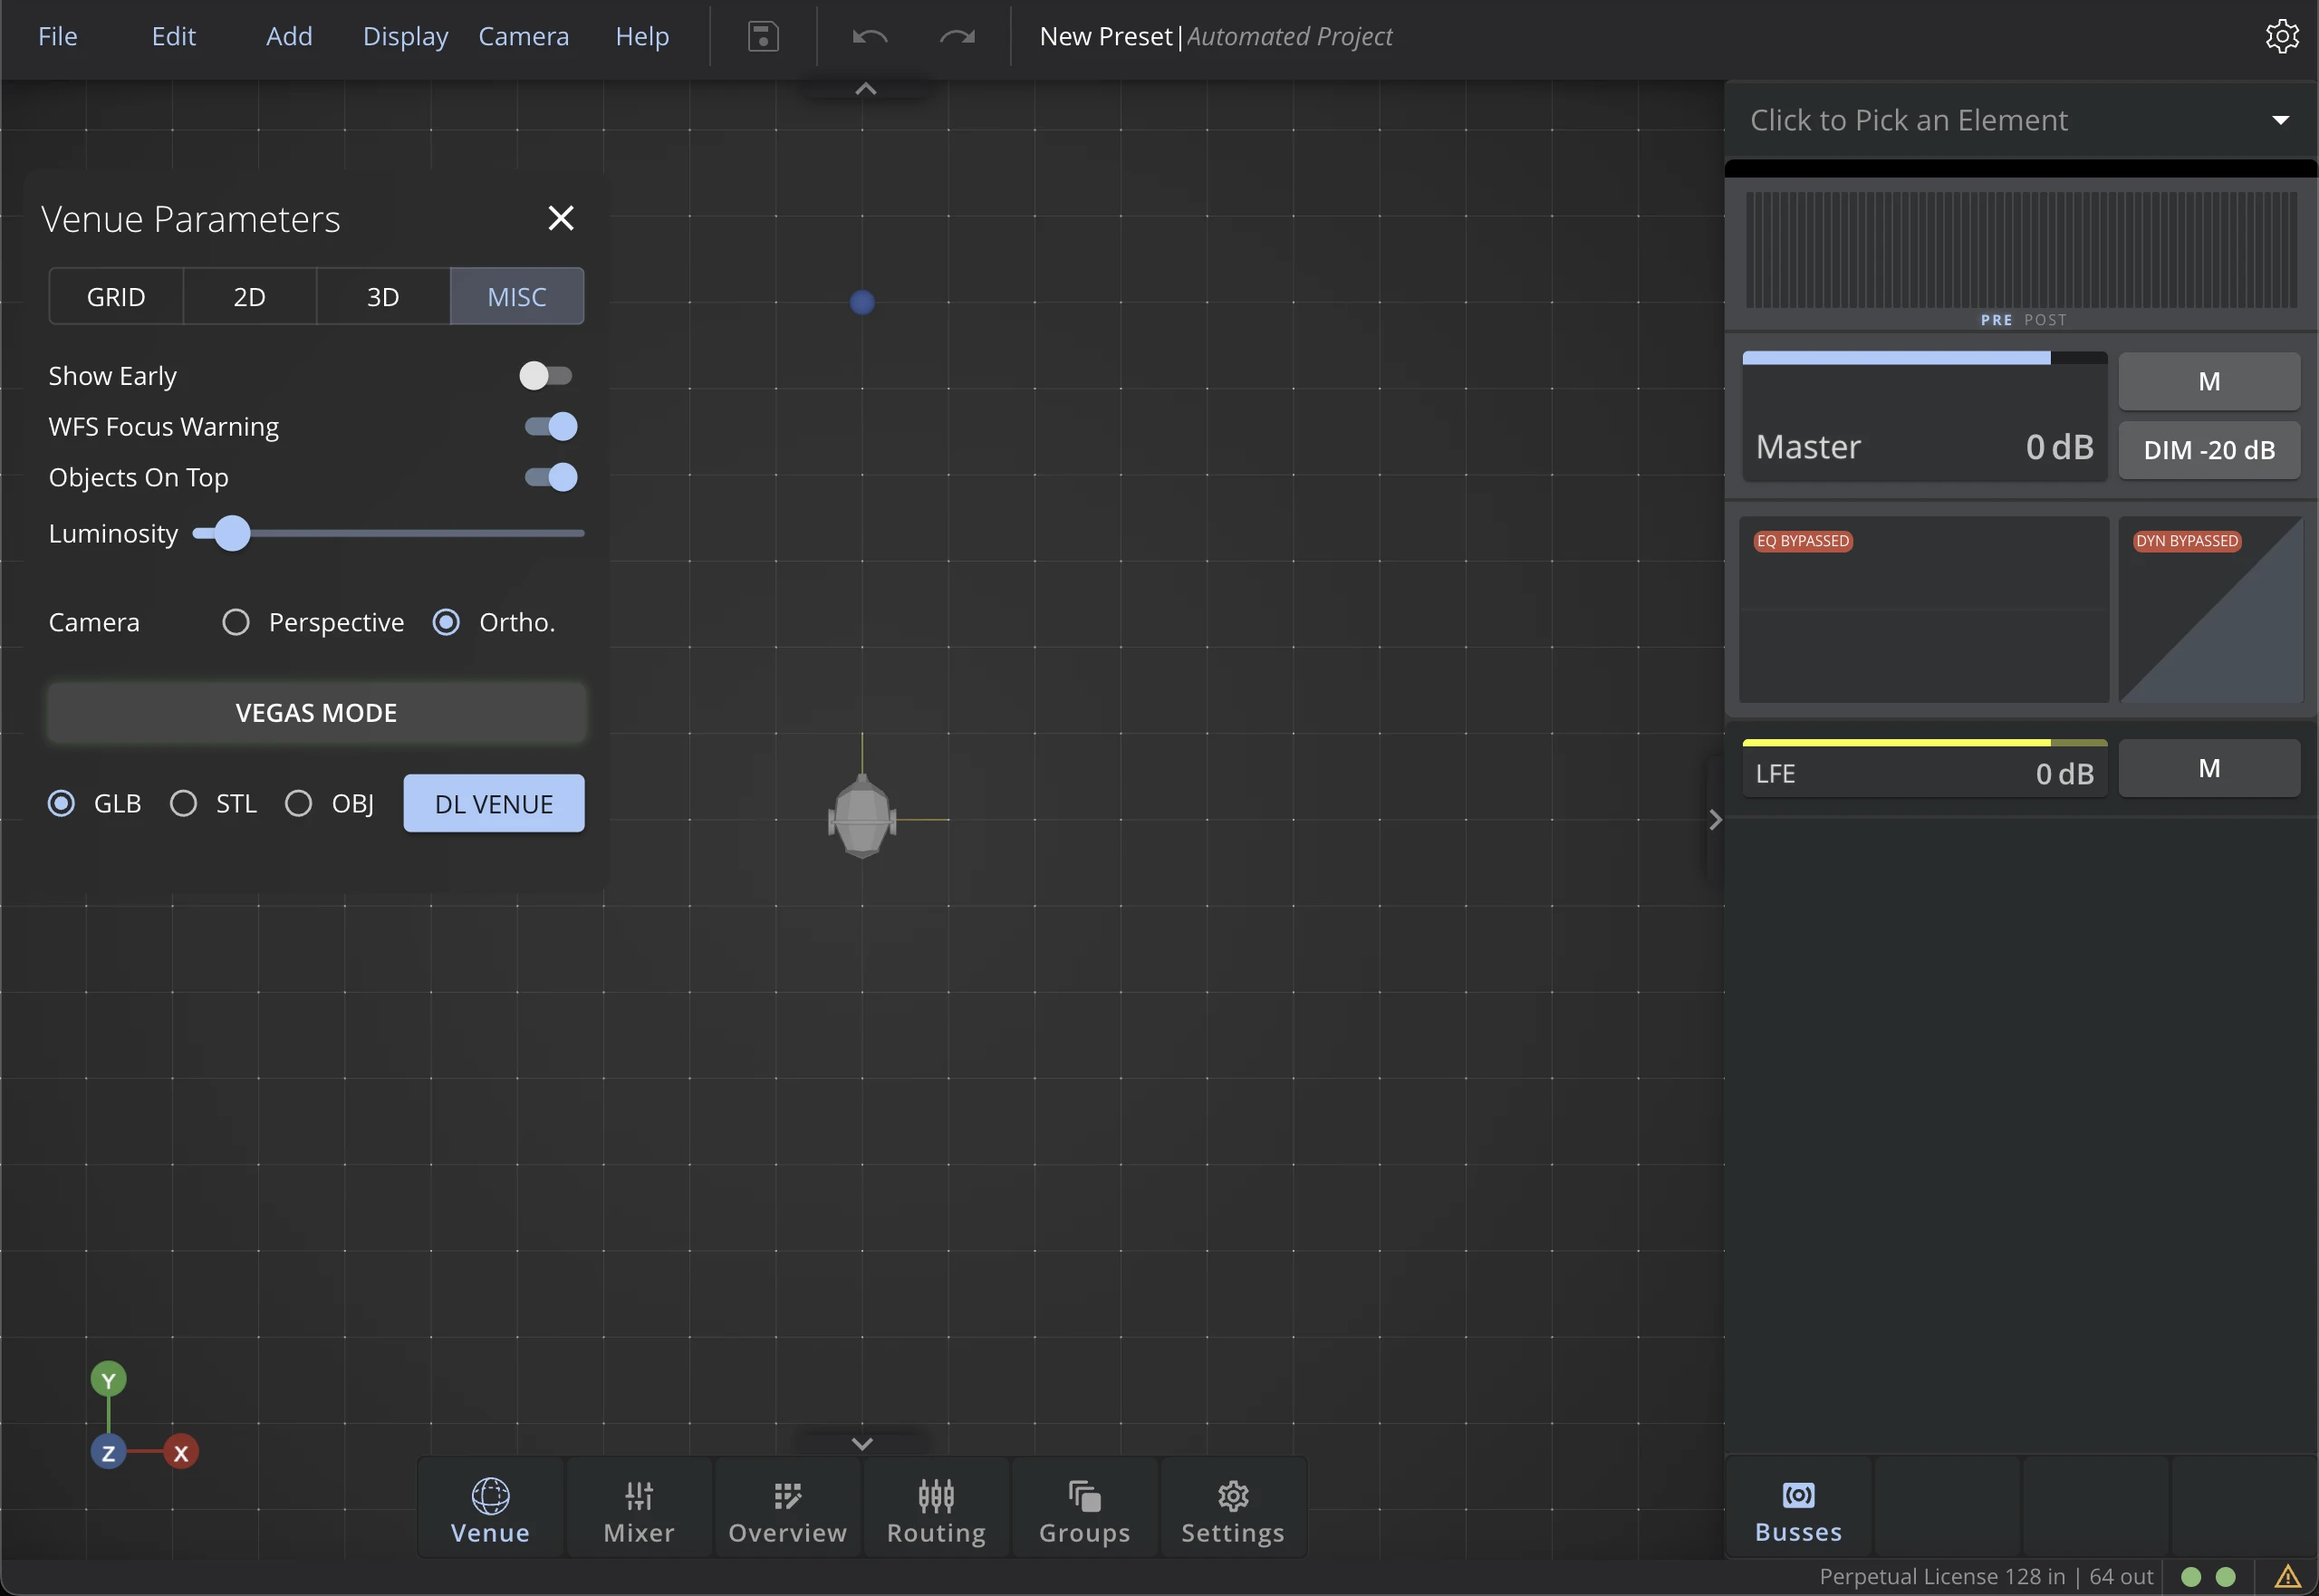
Show Early
Show early reflections of the reverberation items in the venue. This can be useful to have a visual feedback of the early reflections in the venue, especially when working with the reverb items. To know more about this setting, check the Reverberation section of the documentation.
WFS Focus Warning
Toggle to show a warning message when sources are positioned outside of the WFS focus area. This is highly recommended to avoid positioning sources in areas where the WFS rendering is not possible. Learn more about WFS focus area in the WFS rendering section of the documentation.
Objects on Top
Toggle to show the objects in front of the 3D model in the Venue window. This can be useful when working with a complex 3D model that can hide the sources and speakers in the venue.
Luminosity
Set the luminosity of the global illumination of the Venue 3D scene. This can be useful to adjust the brightness of the venue to the lighting conditions of your room.
Camera
Sets the Camera mode to Perspective or Orthographic. Learn more about the different camera modes in the Camera Menu section of the documentation.
Vegas Mode
What happens in Vegas stays in Vegas.
Download Venue Model
Download the current Venue 3D model as an .obj, .stl or .glb file. This can be useful to use the Venue 3D model in other software, or to share it with other users.